Showing posts with label Cartography. Show all posts

6/30/2022

Love Nest

Correspondent Diederik Van Arkel made a request for more nitty-gritty posts on how I produce graphics, in response to my post about 1-bit images. I expect I'll do a lot of that over time, but I'll begin by describing what my Life Cycle of a Simple Risus Map only hints at: the way I construct a Risus map-graphic by working back-and-forth (and back, and forth, and back, and forth) between rasters and vectors.


In Toast of the Town, a Risus fantasy module you can snag for free if you'd like, the PCs are likely to meet a group of NPCs trapped underground in a place called the Nest, a repurposed room accessible from the town's sewers. Toast of the Town isn't a dungeon-crawl, so there's no real need to map the tunnels, but I felt a simple diagram of the Nest would be useful for the Game Master.

All Risus graphics are stick-figure drawings, which gives the game and its support material a goofy warmth I enjoy, and leverages my own absolute inability to draw. Like, I really can't draw. I do drafts of the stick-figures. And then sometimes the final stick-figure is a composite of parts of the drafts, because none of the individual drafts were tolerable. It's that bad.

So, while I have a decent visual sense and can make a pretty map if I want to, a Risus map needs to feel like Risus, which means it needs to be more like a "doodle" than a "drawing." With that in mind, let's follow the steps, to see how I use both Photoshop and Illustrator in a funky back-and-forth to get the doodle I want.


Step One: Scribble in the Art-Hole


Since this is a minor map and doesn't rate a full page, I wanted to fit the map to the page instead of the other way around. So, working with a draft of the laid-out module (you can see bits of copy poking in at the edges), I doodled the first draft directly onto the page, so I'd be 100% sure it would fit the aspect ratio of the "art hole" (what a lot of us call copy-spaces left empty for forthcoming illustrations). The original plan was to have the map where the hole was situated. As in all other creative pursuits, the plan didn't survive to the end, but that's usually a good sign.

It's Supposed to Be a Circle. My High-School Art Teacher Coddled Me.

As you can see, the very-basics are present: a round room with crushed radiating corridors, and two ways to get in: the secret door from the "sewers," and the tunnel leading to a kitchen basement that plays its own role in the adventure. Note my perfect handwriting. Even I'm no longer sure what word I'm labeling the radiating corridors with. Robe? Pole? This is why I'm a good typist.

Step Two: First Pass in Illustrator


In Adobe Illustrator, even a yutz like me can draw a circle and perfect straight lines, so the next step is a simplistic line-drawing using the Pen tool and some basic shapes in pure Illustrator vectors. While I want the map to be a doodle, I want it to be a better doodle than my doodle. I want the circle to be circular and the radiating corridors, crushed though they are, to be a uniform width in their non-crushed places.

In Illustrator, Even a Schmuck Like Me Can Almost Draw

Step Three: Tracing it to Pieces


I print out the Illustrator drawing, and trace it using a Flair marker (all Risus graphics are drawn with a Flair for consistency, and because that was the pen I chewed the most in grade school). At this point, I'm doing the actual doodle I'll use for the module, so the perfect circle acts as a guide, but I'm adding little notches to indicate grooves or supports in the walls, and I'm adding speckles of texture, and furniture and things: everything I know should be there ... sort of.

All Secret Sewer-Temples Available Pre-Furnished.
Ask Your Leasing Agent.

Because this is a planned process, I know I don't need to draw every piece of furniture, and I know I don't need to draw everything in its correct place, so I don't. I know I'll need more than three bits of bedding, for example, but I know that three different bedding symbols will be sufficient, in the final graphic, to make the whole thing feel hand-drawn, so I only draw three. What I'm doing is creating pieces, that I'll later be able to copy-paste and rotate and place correctly. I don't even attempt to draw the door in its correct place, because I know I'll only mess that up!

Step Four: Digital Tracing and Layout


I scan the Flair doodle at high resolution, and, in Photoshop, I simplify it to a 1-bit raster, and clean away any schmutz I don't want. I leave the lines in their rough, natural state for now.

At This Stage It's Just Like Playing in a Mapping Program

I leave Photoshop and bring the image over to Illustrator, where I use the Live Trace feature (Illustrator CS2 to CS5) or Image Trace feature (Illustrator CS6 onward) to trace it. When I first developed this technique for A Kringle in Time, I did the tracing in Adobe Streamline, and you can also use Corel Trace or the Potrace function built in to InkScape, or other methods. In digital graphics, "tracing" programs are those that create vectors from rasters. Tracing can be messy and fraught, and it's only a good idea in very specific instances ... but a simple line-drawing like this map is one of them.

Once the trace completes, I can expand the tracing and group together lines into sensible objects: crates, distilling gear (there's some alchemy, of a kind, happening in the Nest) bedding and so on. Since each object is a group of vectors, I can grab them with my mouse, move them around, duplicate them, spin them, mirror them and so on - they're now just symbols I can use at my discretion, including some stacking (that little pile of three crates I make). In this step, I use the vector-pieces to assemble the map into its final configuration.

Step 5: Smoothing


It's time to leave Illustrator and go back to Photoshop. I rasterize the map at a high resolution, and I apply a nice Gaussian Blur filter to it. Then I "harden" the blurred image by using the Contrast sliders (refer to the graphic for the slider settings). This trick is essential to the Risus look, which always has that kind of smoothing applied to my rough Flair ink-lines. Everything I'm doing to this map, I do to the LCBs (the stick-figures are called the LCBs; it means Little Cartoon Bastards).


To finish this step, I once again drop my bitmap to 1-bit, that magical, lovely format.

Step 6: Tinting and Finishing


So far, we've done a doodle, then an Illustrator drawing, then a physical tracing, then a cleaned-up scan, then a digital tracing, then some "refurnishing" in Illustrator, then rasterizing and smoothing in Photoshop. So we've gone from vector, to tracing, to raster, to vector, to raster again. Yikes. And now it's time to go back from raster to vector!

Vectors are Cold, Doodles are Warm.
When Combining Them, The Warmth Wins Out, Overall.

Back in Illustrator's cold embrace, I digitally trace this new 1-bit graphic, resulting in a new vector. But this time, the goal isn't to arrange the furniture, just to color it. Toast of the Town has a very specific "pale chocolate mint" color palette, which every stick-figure/doodle graphic conforms to, and I begin the finishes by hand-selecting each part of the new trace and applying the relevant color swatches. I finish the finishes by applying the labels, complete with label "halos" to keep the label text from blending too cleanly with the mappity background.

Amusingly (perhaps) the part I'm glossing over is that I create those halos with an entirely separate series of vector-to-raster-to-vector techniques (in photoshop I thicken the label text with a crude application of the Minimize filter, and then smooth it out with that same Gaussian Blur followed by extreme contrast).

Eventually, I end up with a nicely-layered Illustrator document, with map layers underneath label layers, and every visible thing a result of these multiple passes between raster and vector.

This is a Raster of the Final Vectors,
Which Means I Did it AGAIN. I'm Cruel to Doodles.
Click to Embiggen, if You're Into That.

Now, obviously, this is a lot of planning and a lot of steps to end up with a doodle map, and you're probably too cool for doodle maps. I get that. You are super cool; I've always said so. But if your brain is a creative brain, you're already seeing how this technique can apply to many other kinds of carefully-constructed graphics, and you'd be right about that.

If you're an experienced wizard with these tools, you might also be thinking: couldn't this be simplified by smoothing the raster before moving between Steps 2 and 3? It's true that I can, technically, shave a step there, and Risus Game Masters might never notice the difference. The reason I don't is the (beautiful) way the Gaussian technique smooths overlapped lines. Just a moment of reflection should reveal what I mean, but if you're still doubtful, try it yourself, and compare both methods using symbols that you overlap in Step 4. Look carefully at the overlap points in the final image. It's a tiny thing, I know, but this is what I get when I combine my zeal for excellence with my focus on ... badly-drawn stick art. If nothing else, this is how we get our recommended daily allowance of irony. Stay healthy, folks, and remember: my inbox is always open.

6/16/2022

Spin the Wheel

I have Strong Opinions on matters of fantasy cartography. No shock, I know! One of those opinions is that you should never draw to fit the paper. The way I fight that tendency (because it can be really hard not to) is I do a lot of preliminary work on a much, much larger canvas than the target output.

One of the other towns on the same island as Hammondal is called Choragus, and it's not nearly a "city" by any definition, but it's Calembour's only other seaport bigger than a fishing village, and it's got drydocks for ship repairs and shipbuilding, so despite its modest size and relative youth, it's pretty important. I'm just beginning to map it as a kind of brain-break from writing Hammondal's book. The map began like this:


Pretty humble stuff; it looks like I'm playing one of those casual videogames about building public transport ... which isn't too far off from the kind of abstract thinking on display. The red lines are major overland roads (the roads maintained and patrolled by the prince); the brown line is a secondary overland road (the kind sort-of-maintained and sometimes-patrolled by more local administrators). The blue line is the course of a river about to dump into the sea a couple of miles to the northwest.

These are just details from the Calembour map, blown up to scale and placed on a large wheel of green I call the Potter's Wheel. It's about 25 inches wide (a bit more than a mile in scale). Meanwhile, the actual final map will fit somewhere on a letter-sized sheet.

That white cross-like thing in the middle is a masking mockup showing me potential "live areas" of the final map. Neither its position nor rotation are final ... currently everything is perfectly north-oriented. But the area inside the cross shows us where the map might end up someday. Anyway after about a day it looked more like this:


I've let the phantom cross go a bit transparent so we can see more of what's going on. Now I've got a semi-final take on the natural shape of the river, and I've added a local tributary that's too minor to have appeared on the Calembour map. I've also drawn in those major roadways and it looks a bit more like a place. Then I let it sit for a couple of weeks because I was busy with Hammondal proper.

Tonight I started to really break ground (and dredge river):


I've widened the main river a bit, drawn in a couple more (local) roads and what might be a couple of town streets by the time we're done, and I've begun mapping the port and the three drydock bays (currently shown filled rather than drained because it feels clearer, but who knows how it'll go in the long run). There's also a single orange building (the river beacon), and some placeholder boats (carefully excluding any of the Boranese hull-shapes, since it's illegal for them to dock here; Hammondal has a monopoly on dealing with the Boranese).

But what this capture really shows off is the point of the Potter's Wheel: I can spin it, and I do, constantly, because another Strong Opinion I have is that you should never keep drawing from the same position relative to the map, or relative to North or any other direction, because doing so can exert a weird lateral gravity on how you see and design a town, and I don't want that ... so, (especially during the earlier stages) I constantly, randomly spin the entire map and just as often flip it (make it a mirror reflection of itself) as I work. Here, it's been returned to something nearish the north-oriented original, but visibly canted ... but I was spinning it constantly as I went.

Anyway that's the Potter's Wheel method. Eventually, as the town takes shape, I'll begin to see where it's really centered, and what it's really shaped like, and the final framing will take that into account, but until then I don't let the shape of the paper, or any specific orientation, drag the map down.

And it's just fun to spin it.

To Everything, Turn, Turn, Turn


4/30/2022

Shifting Gears in Hammondal

The main "poster" map of Hammondal is complete. It'll still evolve as the book progresses, of course, but it's nice to see it all together ... or even pointedly dissected.


I've begun work on some building interior maps and accompanying exterior building elevations, and I've never drawn elevations before, so I'm at the kind-of-thrilling, kind-of-depressing "I am very very bad at this" phase with them. But, that's where I started with everything else, too, so I'm just going to draw at least one a day until I draw one that doesn't suck, and then from there I'll start really digging into what role they can play in the book. I don't consider their presence optional ... I'm spoiled on elevations from things like Pelinore, and from the WFRP line, and I regard them as an essential ingredient in this kind of book. I think I'll do nice ones, someday, after this run of awful ones.

I'll probably do some more posts about the design of the core game material in Hammondal. I've tried sparking design discussions on Twitter, but Twitter doesn't seem conducive to that sort of thing, so I might shout it more into this void, than that one. Speaking of Twitter:

I don't know if my most honest response to this is "Don't make me choose!" or "Wait ... Politics?"

Anyway, I'm also getting back to mapping the Candle Islands themselves (that's where Hammondal is), and just diving deep into the writing of the Hammondal book. That part's going much, much better than the elevation drawings ... but it's nice to mix something where my skills are confident with something where my skills are ... nonexistent. So far. But give me a few weeks ...

Hope this finds you well. Let me know what you're up to!

4/21/2022

Das Boot

The Hammondal poster townmap is nearly done. What's preventing it from being declared a "complete draft" is boats. I've done multiple passes at "populating" the city's harbor and other waterlines with ships and boats, and each one has fallen short of my standards in one way or another. I'll keep poking at it between fontwork and other stuff. I hope to begin some of the building interior maps over the next week, and I'm excited for those! The obligatory spray of development snapshots follows, and I hope this finds you well.


Some Bullets

  • This is the kind of nerdy fun I really appreciate: Scientist Uses Facial Reconstruction Technology On Skyrim Skeleton.
  • Twice this past week I lost a half-hour's mapping work to software crashes, and a half-hour (an hour total) isn't a huge deal, but I've learned over the years that the only way I can get past that kind of work-loss is to re-do it completely differently, so that way it's still got the fun of discovery mixed in. So, there's an alternate dimension somewhere with two glaring differences in the Hammondal map.
  • My life lesson for the day is that I really shouldn't try to eat yogurt when my beard is in "just got out of bed" mode, because my beard wants some of that yogurt, too.
  • Folks with long memories may recall that Tilly's is the only clothing boutique licensed to use artwork from A Kringle in Time, in one of those classic "mall-store uses RPG art" deals we all know so well. Despite this, they are still in business. Sandra and I walked past one a few days ago (the same location we visited back when the deal came to fruition).
  • I finally snagged a copy of Six Ages: Ride Like the Wind when Steam had a good sale on it. I only 35% bought it because it uses one of my Gelio fonts for the logo. I also got it because I really liked King of Dragon Pass when I finally played it on Android a few years ago. If you've never tried either, they're basically Management Sims with a strongly atmospheric fantasy-narrative presentation and lots of the gameplay deliberately tucked under the hood. Good stuff.

3/07/2022

Fantasy City Under Construction!

Last post, I teased an image of my latest fantasy RPG project, tentatively titled Hammondal: Light of the Candle Islands. This is a type of book I've wanted to do for a long time: a good old-fashioned city sourcebook, the kind that explores a single town in sufficient depth and breadth to make it a worthy all-in-one setting for fantasy campaigning. Here's a mockup of Hammondal as the map stands this morning:

Be Careful Near the Construction Zones

As you may already know, I sold Uresia: Grave of Heaven to Dyskami Publishing last year, along with its supplements and related material, and they'll be publishing a new BESM edition this fall or winter (including One Last New Chapter from me), which means I needed a new fantasy world to write about and run my campaigns in, having said my tearful goodbyes to Heaven's Grave.

As you probably also know, I have a thing for cities and towns. I love imagining them, designing them, mapping them, writing about them and gaming in them, and some of my favorite RPG books have been devoted to cities as settings. I'm also really drawn to "generic fantasy" as a design arena, partly because I love an underdog and generic fantasy is often dismissed as junk, and partly because the design challenge of making something interesting enough to stand on its own but also socketable in a way that makes it useful for a variety of worlds challenges my design-brain in special ways.

So I got to pondering what the boundaries and untapped potentials of "generic fantasy" actually are when it comes to fantasy cities. What tropes are disposable, subvert-ible, intrinsic? What features are needed, and what typical "features" really aren't? Where are the richest veins for surprise, for inspiration, for characters and adventures?

The city of Hammondal is built from my answers (also wood and bricks and things), and as you can imagine, my answers are more than a little satiric, pulpy, swashbuckly and layered in mystery, horror, comedy and humanistic sympathy. It includes my take on everything I've ever loved in a fantasy city book, and my takes on things I've never seen in a fantasy city book, and just lots of shameless excuses for the kind of RPG design I live for.

It also evokes the tensions deep within its own design challenges, and brings them right to the gameable surface. It's a modestly-sized city on a remote island, in a province of a stumbling Empire where foreign trade is taking deep root. It's the collision point for multiple competing cultures, refugees from a lost realm, powerful nature spirits, a wealthy and influential Church, a hidden community of the dead, a disgraced order of mages, a hospital run by Dwarvish nuns married spiritually to a trickster god, and enclaves of fantasy bohemians ... each of which reflect facets of the "generic" fantasy's contradictions in playful ways.

And it does have its own world, just offstage where it needn't trouble anyone, but exerting constant gravity on the design. It's impossible for a city to feel alive without connections to a larger world, so that larger world, too, had to be socketable, made of elements analogous to traditional fantasy ideas while also mixing flavors in surprising ways, and while the city is the focus of the book, the Candle Islands, and the local warlords and Queen not entirely enthused about the Imperial colony on their northern shore, get a couple of pages and maps as well.

The Candle Isles.

Working Out Which Roads Suck Slightly Less

I Love Hexes More Than Anyone Needs To

I am very excited about this book, this city and this world, so I'll pester this blog about it more than once before the book is done, but I'll wrap this up for now before I get too mushy about it. If you'd like a regular drip of maps-in-progress and design musings, Hammondal has a Twitter account, and I also post images to DeviantArt now and then. If you want to see the real-world stuff I'm imagining while designing Hammondal, my DeviantArt favorites page is full of what I fantasize about (some of which is NSFW, but most of which is trees and old buildings and and dirt roads).

If you've got questions about Hammondal that might make a fun blog post, drop me a line and I'll be ever so grateful. If you've got friendly things to say about my maps, I can always use a little of that, too. Either way, thanks for reading, and I hope you feel the beginnings of my Hammondal excitement, too!


And of Course, There Are New Silly Fonts.

3/24/2019

Chatting With Fiona Howat

Of possible interest if you enjoy me rambling: you can hear me doing it in a more verbal, slightly growly, managing-to-blank-on-Greg-Stafford's-name sort of way thanks to Fiona Howat at the What Am I Rolling podcast.

The emphasis is mainly on Risus: The Anything RPG and Uresia: Grave of Heaven, but with some fruitful wanderings into other matters roleplayerly. Fiona's graciousness shines through as clearly as my befuddled fogeyhood, I think. She GM'ed some Risus on her podcast this past December and this amounts to a kind of post-system followup, which I enjoyed a bunch!


10/08/2018

Fantasy Cartography: Just Add Something Blotchy


It's been a while since I've done a graphicky post, so here's a new one for the chilly weather. Over on the doomed platform of magnificence known as Google Plus, reader Michael Lee tagged me to ask:

I remember reading about you taking a lot of pictures that you store away to use as textures and reference for the work you do on your art. If you have an article kinda going through your process on using those photos in a piece, I'd love to have a link to it. If not, is it something you wouldn't mind sharing?

I do make extensive use of snapshots in my graphics, and the technique is so simple it's almost embarrassing, but that makes it super-easy to share, and something even a Photoshop novice can fiddle with as long as they're comfortable with the basic Layers palette.

To demonstrate the effect from the ground up, we'll need some ground. We'll take a chunk from one of my finished maps.

From the Scott's Landing Article
(Uresia: Lore and Curiosities)

I've left the Layers palette visible to show the dance-steps, and in particular I've highlighted the Layer Group called "Texture Bundles," seven grouped layers of varying transparency and blending modes. To see what those layers are actually doing, we'll now turn them off.

All The Graphics in This Post Are Embiggen-Able, But Do So Somewhere With Unmetered Bandwidth; They're Big Images

It's still the same map, but ... smoothier. Soapier. A bit more plainly digital, with those nice-even gradients and Cloud filters and so on.

Having stripped the image of its textures, I'll need a new one. Flipping through the snaps on my phone, my eyes are drawn to this delicious cheat-day indulgence from several weeks ago, so I send it to my laptop and whip it into a tile by copy-pasting the good bits over and over on itself (use the Offset filter and avoid the edges):

Seriously look at how thin that crust is.
It's draping over the lip of a PAPER plate.

Why the pizza snap? It's blotchy, without too many large zones of overtly-different contrast (there are no pepperoni slices, for example). I don't always use food ... I use snapshots of rocks, leaves, vegetable skins, supermarket bins of almonds, dirty painters' drop-cloths, broken concrete ... pretty much anything blotchy or grainy or streaky (remember that Oscar the Grouch song about trash? Like that).

I did some great textures once from a frying pan I'd ruined with a grease fire. Sad day for the skillet, but that was a fine mapping texture. Anyway we just flood that pizza-tile into a new layer:


And that's not helpful, but it's amusing. It becomes helpful when we choose a blending mode for the pizza layer. Three of my favorite blending modes for map-textures are Soft Light, Screen, and Overlay. Here are all three, each at 100% opacity.

Soft Light Mode
Screen Mode
Overlay Mode

Compare. Contrast. Consider. The overly-digital gradients of the base are now crudely and productively interrupted by the contrasts of cheese, sauce, and dried herbal flakes. This one layer, made from a phone snapshot, adds some legitimate character to the map.

It also changes the colors quite a bit, giving it an autumnal vibe we may or may not want. But if we want it to look different, we can just de-saturate or hue-shift the pizza layer. Or we can invert it to a negative-image of itself. Or we can reduce its transparency, or cross-cut two different versions of the same texture (one rotated 90 degrees, for example) or (as I did in the original map) include it as just one transparent texture among many. Or any of a million permutations or combinations of these or other effects.

Some Quick Variations. There's So Much More You Can Do.

This is why Photoshop is one of my favorite videogames. Just one simple "trick" becomes the basis for a thousand looks, and the best way to get there is just play with it. Play and learn.

Hope that gets your juices flowing and/or gets you supporting a local pizzeria. Thanks to Michael Lee for the prompt, and remember: my inbox is always open.

6/05/2018

Shave and a Haircut: Half Price


This is a post about wise practices in RPG PDF production. If you produce gaming material in PDF, you might find it useful. If you don't do production work (in particular, if you don't work regularly in Illustrator, Photoshop, InDesign or equivalent programs like InkScape, Gimp and Scribus), posts like this will be nonsense moon-language. See the left-hand sidebar to escape.


I love graphics production. I love vectors and rasters and vectorized rasters and rasterized vectors. I love fonts. I love photographs. I love pencil and charcoal and watercolor and oil. I love RGB and CMYK and HSB and the feel of Pantone swatches in my hand. I love lossy and non-lossy compression. I love all those things and more, but most of all I love using the right tool for the job, because this stuff matters to print quality, screen clarity, file size, methods of layering, palette consistency and more.

I read a lot of gaming PDFs, and my head dents a lot of desks. Many producers of gaming PDFs make an easy-to-fix mistake: they use grayscale space for purely black-and-white artwork. Alas. We are, every one of us, learning our craft. Let me help you learn one small thing that might make a huge difference in the quality of your work: the power of 1-bit rasters.

Some people call them "bitmap" images. I do, too (so does Photoshop), but that can also mean a raster image in any colorspace, so we'll be careful with that. Some people call them "pure bitmaps" or just "black-and-white" bitmaps. For clarity, I'll try to stick with "1-bit" in this article.

A 1-bit raster has no dimension of hue or saturation, and only the simplest concept of luminance. Like every raster, it's made of pixels, and every pixel is either black or white: yes or no, yin or yang, Siskel or Ebert, Kei or Yuri. No tones, no shades, no mulligans. Black, or white.

This distinguishes it from the grayscale space, which lacks color (hue and saturation) but has gradations of luminance. A layman would call either kind of image a "black and white picture," but one of them has grays.

Grayscale is generally ideal for representing soft colorless media like charcoal, ink-wash and graphite (and digital art created specifically for that space). 1-bit is generally ideal for representing hard colorless media like black ink. Basically, it's right in the name: grayscale has gray. 1-bit doesn't. If your image has meaningful grays, stick with grayscale. Grayscale is fantastic, for gray. Here are two bits of quickie digital art to demonstrate. The first one contains meaningful (or at least pretty) greys. The second contains no greys at all: every pixel is either black, or white.

Click to Embiggen, If Your Viewing Method Permits

Since these are purely digital creations, I could decide, and plan for, their destination colorspaces. When you're dealing with scans of hand-drawn illustrations, it's sometimes less about planning and more about just asking yourself: does this image have meaningful (or at least pretty) grays?

In real terms, every real-world piece of art has greys if you peer closely: even a "clean" ink-drawing will have subtle variations in the black, leftover ghosts of graphite or blue pencil used in the sketch stages, and so on. And, if you're dealing with a freelance artist over the Net, the scan they send may well contain some of these, lingering as schmutz in whatever colorspace they scanned in.

If you're actually doing an RPG book about the beauty of schmutz, then by all means, leave it grayscale, or heck, insist on full-color for the complete in-your face schmutz experience. But if an image is clearly meant to be a clean, black and white image, it belongs in clean, black-and-white raster (or vectorized raster, but that's another article for another day). If the thousands of RPG PDFs available across the Web are any indication, there are a lot of folks unaware of this distinction.

Let's consider an extreme illustrative example. Point your peepers into this folder I've prepared over on GDrive. There are two PDFs (ignore the subfolder for now). They're the same file  size (as close as I could get 'em). They're the same image size (U.S. Letter). They're both distilled from the same source image, a black-and-white fragment of a city map in progress, except one is distilled from the 1-bit version, the other from the grayscale. See the differences?

Guh.

Because grayscale is designed to handle many shades, it has a higher overhead in terms of file size, and responds well to lossy compression methods, while 1-bit has a lower overhead and is perfectly amenable to lossless compression. To get the grayscale version the same approximate size as the 1-bit version, I had to drop it from a buttery 600dpi to a foggy 83, a total pixel loss of 98%, and then subject it to super-lossy JPEG compression (excellent for grays and colors, dead-stupid for black-and-white).

"But S. John!" some may cry. "I don't care about file size! I have a fast internet connection and a stack of external hard drives! I could give two crunchy poops if an RPG book is 20 megabytes or 20 terabytes! File size is meaningless here in the shiny Buck Rogers world we live in! I'll just keep the image gray, refuse to downsample it, and apply only non-lossy ZIP compression!"

And if you're crying all of that, it sounds like you know what you're talking about with the Distiller options, so yes, you can do that. The resulting files will be huge, and it's your prerogative not to care. But, your customers might, and the differences are multiplied by the number of rasters in your book. Quite a lot of gamers are still stuck with DSL or satellite or less. And yeah, affordable storage is great, too, for those who do find it affordable.

But even if you bloat your file to the max, 1-bit images frequently print cleaner on most home or office printers, because of the way most PDF software interprets them. They also render more quickly on slow machines, especially tablets and smartphones. And judging by the many gaming PDFs I've spent time with, a lot of people care about some version of these things, because what I often see is a less-extreme echo of my example PDFs: compromised images downsampled and JPEGged to achieve some kind of more-or-less legible size, when that kind of compromise is unnecessary.

Bottom line on the basics: if a drawing is actually a for-real black-and-white drawing, producing it in 1-bit results in improved quality across the board, without compromise. You can simultaneously achieve higher resolutions, cleaner print, faster renders, clearer on-screen legibility, and smaller file sizes. There's no bad side, no gotcha, no hidden cost.

Then, there's more, as you gain some expertise. Peek at the PDF in that subfolder now, or click here directly, if you like. That's the "Grandma August" map from Uresia: Grave of Heaven. All the meaningful details in Uresia rasters, including this one, are that full buttery 600dpi. The colors aren't fancy, but they're nice enough. It prints clear and it's clear on-screen, even tolerating some zoom. It's nice. I think it's nice, anyway.

File size? One third of a meg. 335 kilobytes. Total. Boom.

Feel free to rummage your hard drive for 600dpi color images of comparable dimensions, weighing in at one third of a meg. While you're rummaging, compare the JPEG version of the Grandma August map, in that same subfolder. Nearly 8 megabytes to maintain the full quality of the image. 24 times the size of the PDF.

What does a full-color image have to do with pure black and white, anyway? And either way, how is this miracle achieved?

There's not a speck of color in the rasters used to create the PDF version. Not a bit. It's made of multiple 1-bit layers sandwiched over a single grayscale layer, and each layer has an appropriate swatch applied as a tone in InDesign ... leveraging two hidden powers of the 1-bit format. First, InDesign (and Acrobat) sees the white pixels as transparent by default, allowing for clever multi-layer bitmap effects (the home-digital equivalent of spot design) without resorting to blending modes. Second, InDesign is happy to tell Acrobat to treat the black pixels as tinted ones, making every "full color" Uresia map possible.

"It's not an illusion, your majesty. It only looks like one."

There's one more trick: I said the meaningful details are 600dpi, and they are: the text, the borders, the town symbols, the oceans: all of that is in a single 1-bit layer of pure black, and things like forest edges and dotted-line borders are in another 1-bit layer, tinted brownish-sepia on its way toward Distiller.

But the parchment background? And the darker forest-fills? I made this PDF using the same settings I used for the earlier example files, so while the 1-bit elements are 600dpi lossless, the parchment (which contains no meaningful details because it's just nonsense parchment backgroundy stuff) is 83dpi and lossy as can be: a grayscale layer tinted the same brownish-sepia (though, in fact, it could just as easily be a full-color layer like the one in the main Uresia world map; there's no significant savings for such a blobby background). In other words, I used the right tool for each job, within the same job.

If that's confusing, well, like I said: that's a sort of expanded 1-bit power awaiting your future expertise, and it's got friends. For now, please consider getting in the habit of using 1-bit files for black and white images (in Photoshop, the colorspaces are under IMAGE > MODE in most versions of the menu; Google around if you need more help). Your PDFs will be smaller, print clearer, and can have much higher resolutions. And I'll suffer a lot fewer head-desks.

I'll post more about RPG production and Best PDF Practices now and then. Drop me a line if there's something you'd like to read about.

6/04/2018

Warm & Crinkly

    “In this replacement Earth we’re building they’ve given me Africa to do and of course I’m doing it with all fjords again because I happen to like them, and I’m old fashioned enough to think that they give a lovely baroque feel to a continent. And they tell me it’s not equatorial enough. Equatorial!” He gave a hollow laugh. “What does it matter? Science has achieved some wonderful things of course, but I’d far rather be happy than right any day.”
    “And are you?”
    “No. That’s where it all falls down of course.”

– The Hitchhiker's Guide to the Galaxy
Douglas Adams


I picked up my first copy of Hitchhiker's at the "Seven-Day Store" on Quantico, a convenience shop where Marines would go for Doritos and beer. They had a wall-rack of paperbacks with distinct leanings for the target audience: science fiction, spy novels, self-help books. They stocked the whole trilogy (this was in the last few months of it being a trilogy in the mundane sense), and after reading the back covers, I knew I wanted them. After begging a couple extra quarters from my father, I had just enough for the first one; I'd get the others as soon as I could.

I met Slartibartfast that night as I raced through the book, addicted from page one. Like that X-Men Annual that would show me a magic item before I needed magic items, Slartibartfast taught me fjords and "lovely crinkly edges" before I needed fjords and lovely crinkly edges. Later on, when I'd sit down to draw my first coastline for an RPG fantasy world, I'd settle for nothing less than a lovely baroque feel, and I knew I wouldn't care how equatorial it was.

Slartibartfast is the source of my obsession with crinkly coastlines, but that's just one facet of warmth, a quality I treasure at every level of RPG creation.

When I wrote about the basic qualities of good RPG writing, pre-blog readers may have noticed the abridged version of my usual laundry list, with "warmth" conspicuously absent. There are three reasons for that. First, that article was focused on RPG writing, while my love of warmth extends also into design and production. Second, warmth thus rated a place in the RPG Lexicon series, and here we are. Finally, and importantly: some genuinely good RPG writing is ice cold, and while my love of warm design is absolute and eternal, it would be unfair to include it on list of fundamental RPG writing ingredients.

Warmth in RPG design is something I love, design toward, seek out, and talk about. What's more, I'm often stopped mid-rant and asked to explain it, because I seem to be simultaneously describing a game's systems, worlds, adventures, cartography, typography, illustrations, page design, themes, philosophies, morals, politics, history and resources. But that's only because I am.


The version most people understand immediately is warmth as it applies to color: the red/orange/yellow side of the color wheel is traditionally the "warm" side, with the green/blue/violet side traditionally "cool." I'd love to tell you this stems from some deep spiritual properties inherent in the magic of color (because that would be romantic, and romance is warm) but the ice-cold truth is that of simple association: yellow with sunlight, red with blood and red-hot iron, flames with all three, and so on, while blue and it's neighbors evoke cool water, cool evenings, cool forest glades and death by frostbite. It's not magical or mysterious, but the emotional and thematic impact of color choice is difficult to overstate. It's more than just hue, too. Saturation connotes more warmth than de-saturation: the greyer a color is, the cooler it is, even if it's orange fire greying to cooler ash. Brightness, too, tends to connote more warmth than cold darkness, so this hits every part of the HSB graph (translate to RGB or CMYK at need).

In other graphic terms, straight lines and sharp corners are frosty; wavy and curvy are warm. The same associative logic applies to arrangements and spatial relationships: a perfect line is cold, but perfect parallel lines are even colder (distance is cold, too, so if they're parallel but far apart, that's even colder). A row of perfectly spaced, perfectly-aligned boxes may as well be ice cubes, especially if there's lots of cold air between them. Warm elements relate imperfectly and hug closer; they're too alive for symmetry (life is warm and death is cold). A hand-drawn line is the warmest line, because it feels more human, more organic, more personal, more likely to collide with something or even trip over itself. A perfect vector line is cold because it's mechanical, devoid of individuality, devoid of texture or deviation. Idiosyncrasy is warm.

Warmth is casual and playful; formality and conformity are cold. Warmth relaxes, kicks off its shoes, but it loves socks, because softness is warm. Fluffy is warm. Warm reclines by the fireplace, because actual warmth is warm. Sensuality is warm. Blankets and rugs, slippers and towels, warm from the hot dryer on a cold day. That's one of my favorite little ironies: if your RPG setting is wintry, it's more likely to have warmth, because if it's ice-cold (hard, sparse, dark) outside, a lot of the imagery will be about cozy coats and bulky sweaters, Viking halls with firepits, welcoming inns with hearthside ale, yellow light in frosted windowpanes, the life-saving guts of a light-sabered Tauntaun. Norway is cold but it isn't cold, because Slartibartfast gave it crinkles and Norwegians keep it cozy.

All these things bridge toward emotional and conceptual warmth, because home is warm. Home is lived-in, used, rumpled, messy. Home smells like cooking and pets and grandma's farts, and all those are warm. Brewing coffee is warm, baking bread is warm. The word WELCOME on a mat is warm, and the sentiment "welcome" even moreso, because sentiment is warm. Hugs are warm and love is warm and comforts are warm. The past can seem warmer than the future, partly because familiarity is warm, but the quality isn't limited to the past. Serenity is a warmer starship than Enterprise precisely because it feels so lived-in, homey, messy, imperfect, dirty. It wears its past on its sleeve so the heart rides with it. Fortunately, Leonard McCoy brings the warmth of a thousand suns, so Enterprise is fine.

Fallibility is warm; awkwardness is warm. Cold speaks to the intellect but warmth to the heart, so failure is warm, yearning is warm, well-meaning mistakes and embarrassment are warm. Sincerity and hope: warm. Sympathy is warm. Friendship is warm. Variety is warm. Humanity is warm. Fear is cold but every cure for it is warm. Courage is warm. Passion is warm. Contradiction is warm, and that's a good thing, because if you're designing for warmth, you'll meet more than a few contradictions, because this stuff isn't algebra (math is cold!) There are times when, according to context and connotation, any of these observations gets flipped on its ear. That makes it unpredictable but, that's okay. Unpredictability is warm! Just, not consistently.

This term is crucial to the lexicon because warmth is one of the stars I steer my work by: a core design ideal. That's not to say I don't also work with ice. Like with Norway, ice provides the contrast that makes the warmth brighter. Plus, sticking purely with warmth would be homogeneous, and that's cold. See? It's an excellent source of your daily irony.

It's also, as a gamer, a quality I crave, and I frequently go hungry. For a variety of cultural reasons, cold is the predominant temperature in RPG design, writing, and production, and has been across the hobby's history. There are, of course, many delightful exceptions, and I search them out, scoop them up, hug them, and game with them.

If you've been following this series, I'm sure you can't help but notice that the Invisible Rulebooks have a hold on me, in part, because they're rich in warmth and warmth-potential. The gaming territory they represent is the messy place outside the vehicle, as it were. It's about putting your feet on uneven ground, where the rules aren't just unseen, they're soft, malleable, irregular, contradictory, and ultimately down to the natures of fictional characters and the idiosyncrasies of a human GM. The resulting form of play is so frequently marvelous it kind of spoils me, on both sides of the screen, because that arrangement only works when there's a powerful mutual confidence in everyone's intentions and abilities. A confidence that, when it's present, warms the bones of every piece of related game design.

I'm sure there's a word for that, somewhere down the winding back-country road of the lexicon.


5/23/2018

Town Maps: Tops, Bottoms, and Hot-Spots


Correspondent Joshua Wolfe writes:

"Your maps always look so pretty. Is your process for map-making towns bottom up or top down? Do you start with your list of hot spots and assemble how the town should look around that? Or, do you start with an idea of how the town and topography should look and then see where your location ideas fit into it?"


Thank you! Those terms sound kinky! The short answer is "neither," but there are always shades of each, so the short answer is actually "both." Unless it's "neither." Or both. I mean answers. Let's restart.

I've never drawn a town-map without prior context; it's always within an existing setting (Uresia or some other world I'm mapping that day). Consequently, there's always something established before I begin, even if it's just the location of the nearest coastlines and the nearest relevant mountains and what kingdom/realm we're in. So even if I wanted to begin without considering those things, it's never an option.

My Master Hex-Map, Unpublished For a Reason: It's Super Dull


After that we dive deep into "it depends." I don't just write about Uresia; I GM the hell out of it, so it's rare for me to map a town we (the players and I) haven't already gamed in or at least heard in-game stories of.

Sometimes, that amounts to what might be called "hot spots." From recent games in Jubilance, for example, we know the city's Guild of Lapidaries has a heavily-constructed (stone) guildhall on the east end of town, that it has two above-ground stories, and a walled yard tucked against the town's own wall. So, if I get around to mapping Jubilance in "town scale" (like Trostig and Scott's Landing), I'd need to (A) beat my head on the desk because I really need to stop mapping cities in town-scale and (B) make sure there's an appropriately-shaped building in approximately the right area. Town-scale doesn't include low walls on the scale of a single burgage plot, so that detail wouldn't need to be present: just a largish stone building and some greenery in the yard. Maybe a teensy fountain if I want to indicate how swank it is to be emerald-cutters in Dreed (it's very swank).

But everything else we know about Jubilance is the kind of stuff that wouldn't show up at that scale: we know an inn where the PCs stashed their stuff (they never got to sleep there), a bordello where one of the knights did some stuff (again, sleepless), a tavern where tavern-things happened, streets down which a happy parade of Trolls bebopped, and a seaport where seaport-things went on.

There were memorable moments attached to all of them, but on those town-scale maps they'd all just be ... streets, a seaport, and teensy little town-buildings occupying ordinary plots of land. Those memorable locales would look exactly like their never-visited equivalents.

And that's true of most town locations, really. I generally map towns in two styles: the town-style, and the city-style (which shows only major streets and oversized permanent structures like walls and citadels).

Now, just between you and I: I'll absolutely linger on those little boxes, giving them special attention, because they have identity in my mind's eye. But I also take care to linger, almost at random, on a certain portion of all the little boxes, because otherwise the town looks bland. I can't abide a Row of Identical Rectangles unless I'm deliberately trying to communicate that this is a particularly ordinary, even tedious, row of buildings. I want every town map to be filled with stuff I do understand and stuff I don't, and I learn a lot about each town when building them.

Some of the Simplest Boxes Have the Most History and Vice-Versa

Uresia isn't a "medieval" world in any serious sense, but it does have a certain Gone Drunkenly to the Renfaire aesthetic, so most buildings are scaled and arranged in a hand-wavey Oldeish Europe sort of way, where I stay conscious of how each town arranges lots and frontages and closes so as to make the town survivable to tiny meep-meep cars in the imaginary Uresian future, but terribly inconvenient to a lumbering full-size American sedan.

So, there are rules I draw by (broad rules based on cultures, specific exceptions based on cultural collisions and local circumstances), and inevitably a few basics in my head, going in: Jubilance has walls (not always a given in Dreed); Jubilance has that nice east-end guildhall for the Lapidaries; Jubilance is a seaport on the northwest coast of the island. It's a couple of days' hike to the mountains, and it has generic town-type-things. It's Dreed, and it's got emeralds, so it's at least partly, grossly, rich (which means broader frontages, more frequent fountains, more frequent greenery).

Having gamed there (and having already mapped all the Uresian coastlines) I have a general shape which emerges from necessity.

So that's square one. A mushy blend of hot-spot and topography. Instead of top-down or bottom-up it's just sort of saggy middle. Imitating its creator, no doubt.

From there, the process is iterative. I don't just start with a blank sheet of paper and draw 'til it's done (I've seen people who do; they impress me). I start with a blank piece of paper and scribble a deeply crappy first draft.

This follows my approach to writing. I'm a huge fan of "splat the first draft, [insert gross sound effect] and then sculpt it into something that's less like hot garbage." Sculpt it via second and third and fourth and as many drafts as it takes.

As those drafts roll out (freehand, usually on whatever cheap notebook paper comes to hand, or clean sheets stolen from the printer tray) I learn more about the town (including hot spots and topography, along with history and resources and fires and wars and hills leveled and ditches dug and walls argued-over because pennies got pinched), and I interrogate the design, engaging in fruitful acts of doubt, questioning why-is-this-there and why-is-that-shaped-that-way and shouldn't-there-be-a-more-direct-route-from-this-gate-to-this-marketplace and so on.

Sometimes I Use SketchUp to Visualize the Elevations

I don't consider any of this to be the cartography. Not yet. During the splats I'm just designing the town, and it's a bit like the distinction I make between RPG design and RPG writing (click here for that): I want to have a lot of the design finished, solidified, interrogated and multiply-drafted, before I start worrying about how to present it (presenting it: that's the cartography).

Once I'm satisfied that I know my way around, I go digital: using scans of the least-splatty drafts, I begin constructing the territory (water, elevations) in Adobe Illustrator or some other vector-art software (I built the original Shadow River plan in DTP software because Illlustrator still terrified me in those days, but the principle's the same).

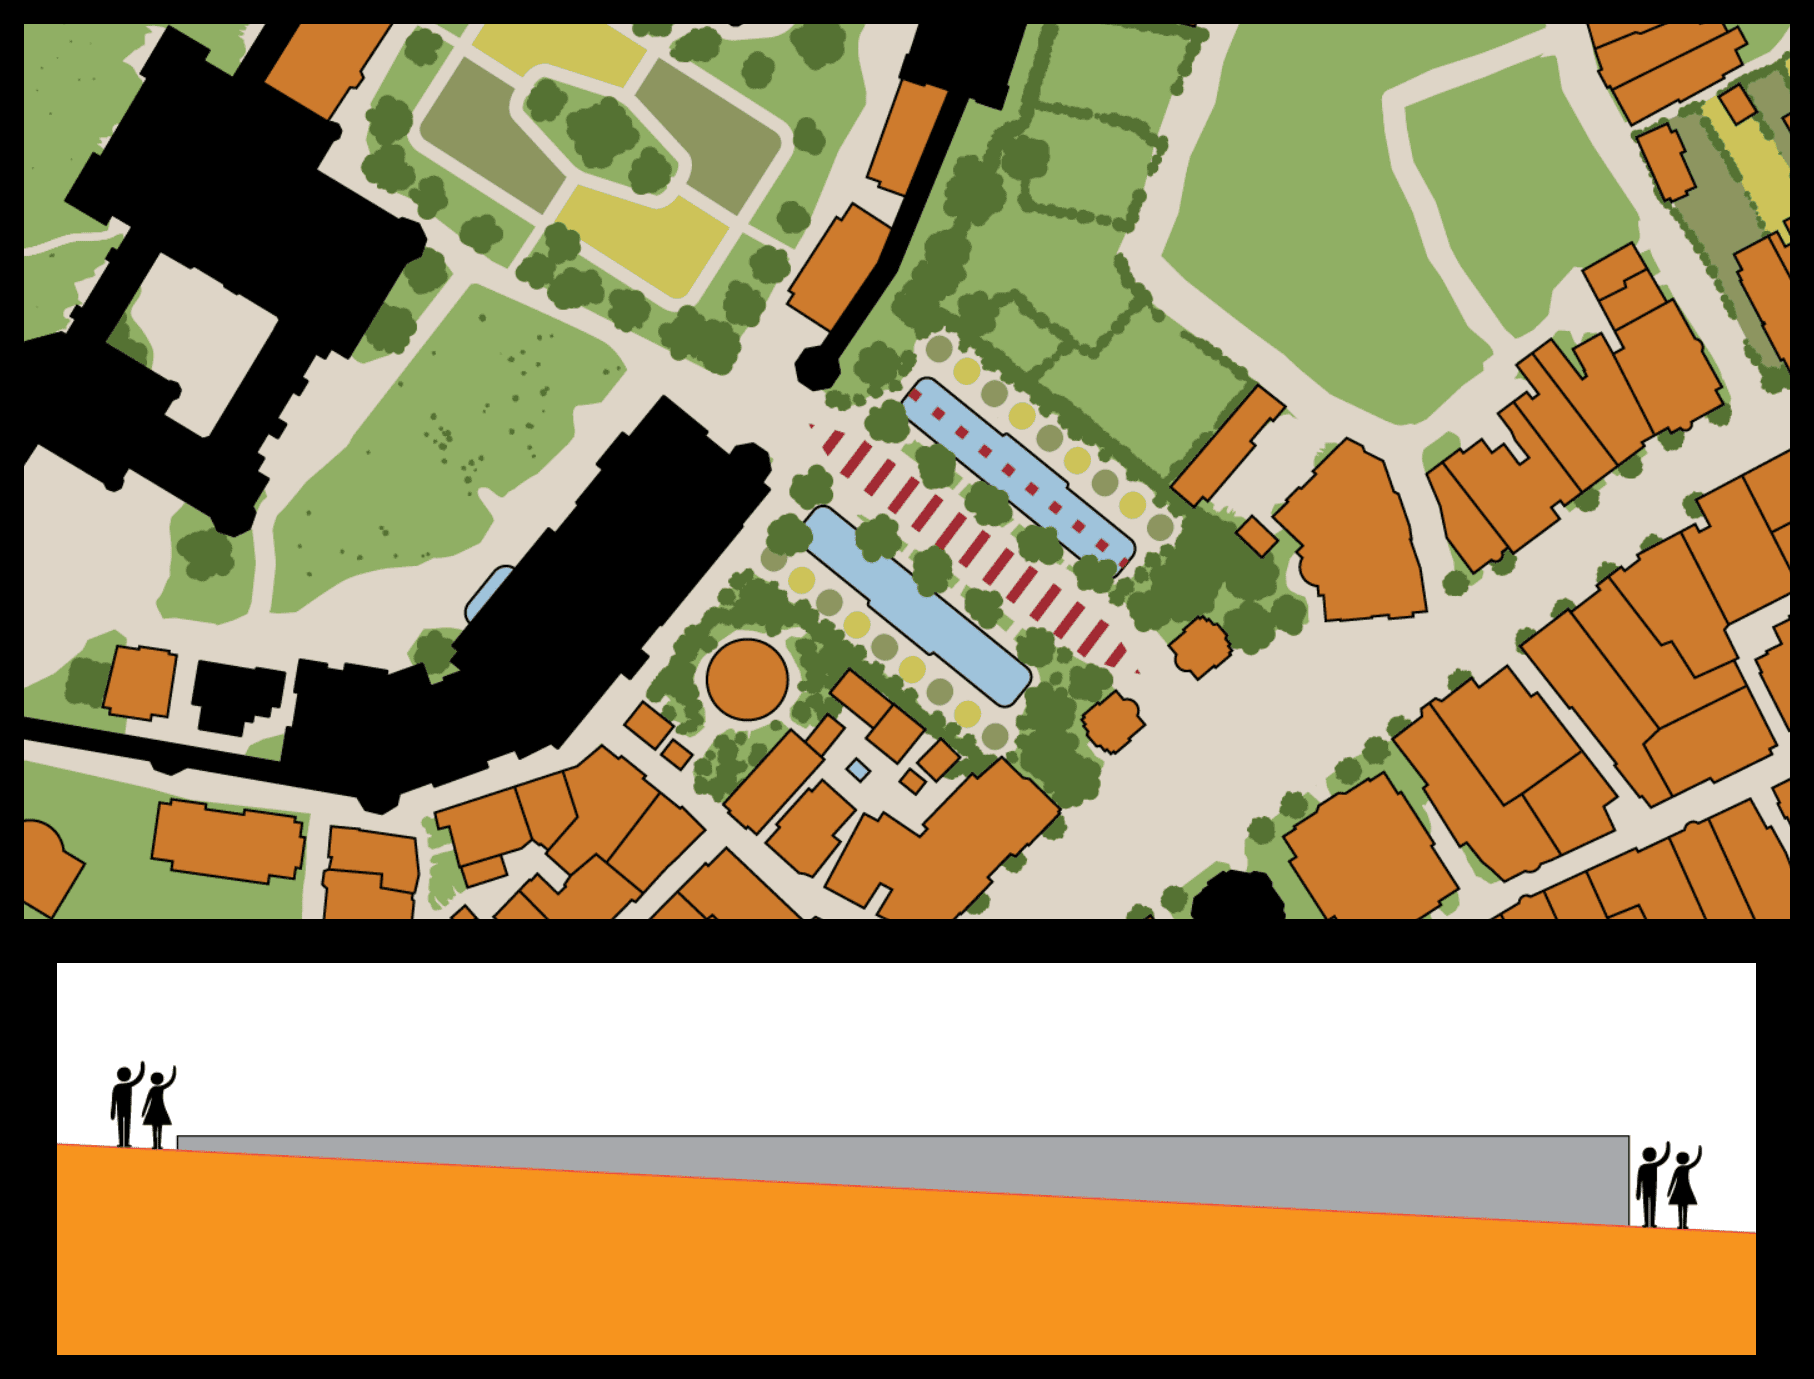
And then I really go to town ... In city-scale, I focus on the identities of entire neighborhoods and principal landmarks. In town-scale, I go less sane: lovingly obsessing over each close, alleyway, street and square; every space allotted for caravans or livestock; every bit of clean water that becomes nasty water and flows somewhere else. Literally every single tree (within town) and then swaths of forest beyond it, if there are any. That part's a long story.

Once it's done, I can drag those nice clean vectors into Photoshop to thrash them around, warm them up, and give them their final textures and colors. This often means a return to natural media: the way I get watercolor textures, for example, is I splat some cheap supermarket-toy-section watercolors on equally cheap paper and scan it. I also use textures made from photographs I take of everything from rocks to leaves to other rocks to food to stones to rocks.

And that's the process. Such as it is. Tops, bottoms, hot-spots? Yes? Sort of.

From Cold Vectors to Warm Textures